Pumpkin Ricotta Stuffed Shells w/ Sage Cream Sauce


Time to enjoy the abundance of pumpkin. This is a tasty elegant dish.
Pumpkin Ricotta Stuffed Shells w/ Sage Cream Sauce
Shells:
24 jumbo pasta shells
1 tablespoon extra-virgin olive oil
22 ounces ricotta cheese
1 can (15 ounces) pumpkin puree (or homemade)
3/4 cup  Romano or Parmesan cheese
1 large egg white
2 garlic cloves, minced
2 tablespoon finely chopped sage
1 teaspoon salt
1 teaspoon freshly ground black pepper
 
Cook pasta in a large pot of boiling salted water until tender but still firm to bite (9 minutes). Drain. Transfer to a baking sheet. Drizzle with oil.
Preheat oven to 350 degrees.
In a medium bowl, stir together ricotta, pumpkin, and all remaining ingredients.
Butter the bottom of 13-by-9-inch pan. Fill each pasta shell with pumpkin-ricotta mixture. Arrange in pan. Cover pan with foil. Bake 30 minutes. Remove foil, pour Sage Cream Sauce over and bake 15 minutes longer until bubbly. 
Sage Cream Sauce
3 tablespoons butter
1/2 cup chopped pecans
1/2 cup finely chopped shallots
2-3 tablespoons chopped fresh sage 
1 cup dry white wine
1 quart whipping cream
Melt butter in heavy medium skillet over medium heat. Add pecans and stir until slightly darker and fragrant, about 3 minutes. Using slotted spoon, transfer pecans to small bowl. Add shallots and sage to same skillet. Sauté until fragrant, about 30 seconds. Add wine and cream. Increase heat and boil until sauce is reduced, about 5 minutes. Pour over shells and sprinkle with pecans.


Julie Fergus, ASID, is a nationally published interior designer. Her studio and showroom is located in Wolfeboro, New Hampshire. Julie is a frequent entertainer and "chef" she knows well how homes and kitchens work. She uses this real-life experience combined with her professional expertise to create homes that function well and look beautiful. Julie's clients are primarily in the Lakes Region and Mount Washington Valley, however, she will travel throughout the state and North East.  www.JulieFergus.com  | www.DesignByMail.com

Hanging Artwork Tips

All too often, I see artwork in homes that is hung too high. For spaces with 8' ceilings height, it is best to hang art, photos, or mirrors so that the top of the frame is at 72-76" from the floor. This will vary depending on the size and shape of the pieces. The art should be balanced with the furnishings and placed within your eye level.
Here are quick tips:
  • art over a sofa should be proportionate to the size and either one large horizontal piece, or three pieces that create a horizontal visual
  • large vertical pieces work well for spaces with very high ceilings - avoid them if you have a low ceilings
  • group smaller framed pieces to create a block of color and visual
  • avoid hanging pieces on a diagonal
  • if a piece is small, hang it lower so that it balances furniture pieces
  • when hanging multiple pieces in a horizontal row, center the pieces on one another for a staggered top and bottom
Combine art with non-art for visual interest and contrast.

For visual simplify, place one large piece on a wall.

For small pieces, hang them lower than 72" to top so that it will connect with the furnishing below it.

Always try to hang art at the end of a hall or space so that it creates a focal point. Hang horizontal pieces using a common center-line.


Julie Fergus, ASID, is a nationally published interior designer. She creates beautiful and functional homes for Everyday Living with one-stop shopping. Contact Julie to schedule a complimentary "get acquainted" meeting to discuss your project and to learn about the 7 Steps to Design for Everyday Living.
 
Her studio and showroom is located in Wolfeboro, New Hampshire. Julie's clients are primarily in the Lakes Region and Mount Washington Valley, however, she will travel throughout the state and North East. www.JulieFergus.com | www.DesignByMail.com

Why I Love My Wood Cookstove

Here is my vintage wood cookstove.
On a snowy day, as it is the day I write this post, I work from home and I get the woodstove going. My woodstove is a cookstove. It is an amazing hunk of cast iron that heats my kitchen and family room to upwards of 79 degrees when really cranked up.

When the woodstove is going to be roaring all day, I'll cook a food that takes a long time. This time, I am making a beef stock, then I'll make a beef stew using the stock.

Using a variety of beef bones and a bone-in pot roast ($14.00 for all) I place in roasting pan and sprinkle with salt. Into the woodstove oven it goes to roast for about 30-40 minutes to get the juices flowing and nice browning.  The key to a good stock is to roast the bones before putting them into a pot of water. You can make stock with pork or use left over roast turkey or chicken bones for a great stock (no need to re-roast turkey or chicken already roasted). For more tips to make stock click here.


Remove the meat and bones from the roasing pan and deglaze it using wine.  Cut beef into bite-sise pieces and place into large pot. Add peeled and chopped carrots, a few celery stalks cut in half, and 2-4 bay leaves. Cover with water until coverd by couple of inches of water.


Then it sits on the stove simmering for hours. Once the meat is tender I remove some of the stock to freeze and save for future use.  With the remaining stock and tender beef I'll make a curry stew using a favorite recipe from Epicurious. We love it served over sticky white rice and fresh warm bread.


Julie Fergus, ASID, is a nationally published interior designer. Her studio and showroom is located in Wolfeboro, New Hampshire. Julie's clients are primarily in the Lakes Region and Mount Washington Valley, however, she will travel throughout the state and North East. www.JulieFergus.com | www.DesignByMail.com

Board Mounted Valance Ideas

Board mounted valances mean that the fabric treatment is attached to a board. Thus eliminating the need for decorative hardware. This can be a visually simpler and usually lower cost. Design options are limitless.
Tip: Install the valance well above the window glass so that the view and light are not blocked. This will make the window appear taller.

Here are examples of the many possibilities of board mounted valances. All were designed by me and fabricated by my professional workroom.

106" width is possible.


Contrasting fabrics create detail.

Simple box valance.

Box style with two contrasting pleats.


Shaped valance with contrasting welt and center accent.
Trim and two fabrics.

Trim adorns the top and a contrasting fabric in a center pleat offer a simple yet interesting treatment.

Two fabrics, contrasting patterns and shapes enhance details of the room.

Tight area required a simple treatment to allow the pattern to be the focus.

Shape and pattern offer a lot of decoration in a simply detailed space.
Julie Fergus, ASID, is a nationally published interior designer. Her studio and showroom is located in Wolfeboro, New Hampshire. Julie's clients are primarily in the Lakes Region and Mount Washington Valley, however, she will travel throughout the state and North East. www.JulieFergus.com | www.DesignByMail.com

Creating a New Color Scheme

Where to start when starting a new room from scratch? Start with fabrics. A color scheme can be as simple as asking yourself what colors you like. Once you do that, you narrow your options. In this example photo, the client likes spice and green. As you can see from these fabrics, the actual tone of the colors can be lighter or darker.

When shopping hone in on the colors and then see what appeals to you. Typically most people will know what they like when they see it. The hardest part is just getting started. If you need inspiration or direction, look to your wardrobe, what you typically wear is what you might show the colors you are attracted to.


Julie Fergus, ASID, is a nationally published interior designer. Her studio and showroom is located in Wolfeboro, New Hampshire. Julie's clients are primarily in the Lakes Region and Mount Washington Valley, however, she will travel throughout the state and North East. www.JulieFergus.com | www.DesignByMail.com

Italian Christmas Cookie

Cookies with a simple icing.

A festive and simple cookie that will be enjoyed by everyone. It is fun to make and young children might enjoy helping.

Italian Christmas Cookies
4 eggs
1 cup sugar
1/2 cup butter
2 tsp. vanilla
3 1/2 cup flour
4 tsp. baking powder

Sift dry ingredients. Cream butter and sugar, beat in eggs; add vanilla and dry ingredients.

Knead and add flour as needed to keep dough from sticking to hands. Pinch off dough, roll in your hands to form a log and then twirl into shape. Place on greased cookie sheets. Bake at 375 for 10 minutes.

Icing
2 cup sifted confectioner’s sugar
2 tsp. vanilla
6 tsp. water
Stir until creamy

Dip cookies into icing and sprinkle with trim. Place on wire rack with wax paper on counter to collect the dripping icing and sprinkles.

Place iced cookies on wire rack with wax paper under for easy cleanup.


Julie Fergus, ASID, is a nationally published interior designer. Her studio and showroom is located in Wolfeboro, New Hampshire. Julie's clients are primarily in the Lakes Region and Mount Washington Valley, however, she will travel throughout the state and North East. www.JulieFergus.com | www.DesignByMail.com

Old Family Recipe - Nutroll

This is a very old family recipe passed down through my family by my slovak great-grandmother.

Nut Roll Dough

10 1/2 cups flour
1 1/2  pounds butter
5 eggs
4 1/2 tsp. powdered sugar
1 1/2 can evaporated milk
2 rapid rise yeast packets
3 tsp. vanilla
9 tsp. baking powder
Mix butter and flour as for pie.  Add eggs, powdered sugar, yeast,pinch salt vanilla and baking powder.  Mix in the milk, knead it into a large ball. Let stand in refrigerator for a few hours.  Makes about 14 rolls. 


Nut Roll Filling

4 pounds of shelled walnuts
1 cup sugar + more to taste
1 egg white beaten
1 can evaporated milk + more to make filling spreadable
1 tsp. vanilla
2 tsp.+ almond extract - to taste
Grind nuts fine in food processor or grinder - nuts must be very, very fine. I use the grinder attachment on my Kitchen-Aid mixer. Mix ingredients in bowl.  The above are approximate amounts; you may need to add more milk to a make it spreadable and more sugar to sweeten. 

Create a mixture of powdered sugar and granular sugar; use this to roll the dough on Instead of flour. It makes It sweet and a nice crusty outside finish.

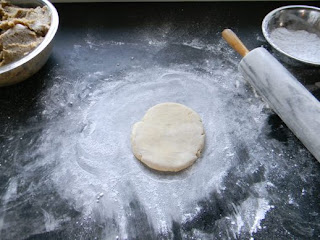
Take a tennis ball size of dough and roll it to 1/8 inch thick.  Spread with nut filling all over the dough (not too much). Roll up, like a jelly roll and tuck ends under.  On a baking sheet create foil boats - 3 per sheet. Once the roll is formed, set nut rolls inside boats and bake.

Place inside the foil boat and bake at 350 degrees for 30-40 minutes or until light brown.

Once cool, wrap each roll in the foil and store in the freezer until to you are ready to slice and serve.

here is the roll sliced.

Griding the nuts.

The walnuts very, very fine.

Start with a tennis ball size dough ball.

Roll till about 1/8" think and spread nut paste.

Roll the roll.

Bake rolls in foil "boats"